
Saturday, November 24, 2018
Phone Charger Protection Cord
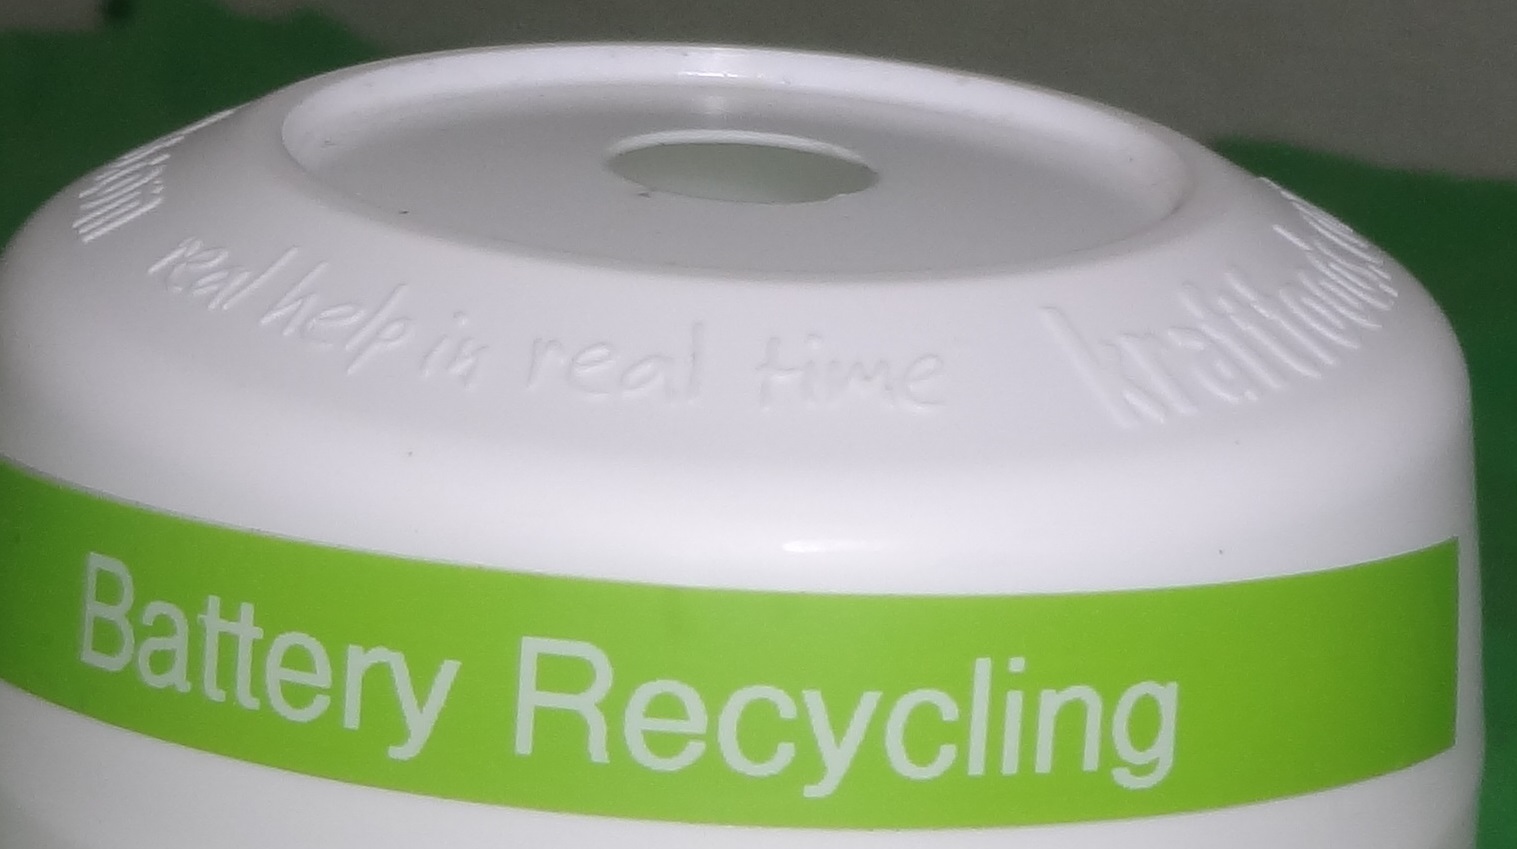
Sunday, October 28, 2018
Battery Recycling Program

After watching a news story about battery recycling by a local fourth grader, I was inspired to start a program at my school. I originally started with my social skills teacher, then I decided to give a container to my algebra teacher. Next I gave one to my physics teacher, and put one in my school library. Often, math and science teachers have upwards of 30 calculators, each using 4 AAA batteries. When the batteries go dead, they have been discarding all 4 batteries. Most of the batteries I have gotten so far have been completely dead AAA batteries, but I have gotten some rechargeable AA batteries that were perfectly good, 1 perfectly good AA battery and more. I was able to return 4 brand new batteries to my algebra teacher so they could be used. I have been using plastic koolaid mix containers, with a hole large enough for a AA battery drilled in the lid. I printed a label with a label maker so everyone will know what the container is for. I check the containers every time I have those classes to see if there's any to collect, and then I take them home to test. If they are completely dead, I collect them until I have a a large batch to take to the library. If there is some life left in them, I will use them up first. The ones I tested that seemed brand new, I returned to the teacher.
Here is an affiliate link to a newer version of the label maker I used: https://amzn.to/2DbT6E7
and the green label tape https://amzn.to/2qhQwUs
The label maker uses 6 AA batteries or an AC adapter. It uses a lot of power- 9 watts- because it is a thermal printer. I would use an AC adapter because it is hard to find 6 old batteries that are good enough for this.
Monday, September 24, 2018
Repairing a Scrabble Timer
One of my teachers has a Scrabble set that she purchased at a garage sale. It's a 50th Anniversary Edition which came with fancier pieces and board, a dictionary, and a timer. The timer did not work. I tried to help by replacing the single AAA battery, but that didn't fix it.
The old AAA battery was very corroded, especially at the negative end (because it expired 18 years ago!). The negative terminal in the battery compartment was also extremely corroded. I took the timer home for further troubleshooting. Once I opened the timer, I could see that the negative wire inside was corroded off, and the PCB was damaged around the button.
My mom's digital kitchen scale had the same problem with the wire corroding off, and I was able to fix it by just replacing the wire. For the timer repair, I had to replace both the negative wire and terminal spring, using parts I salvaged from other things I took apart.
The corrosion on the timer continued onto the circuit board. First, I tested to see if the chip was still functional by connecting a AA battery to the solder joints on the circuit board. I heard a beep, which meant the chip was getting power, so I decided to continue the repair attempt. I cleaned the switch area with alcohol, but the damage was too severe. It's the worst corrosion I've ever seen.
The screen display worked, but the button did not. So next, I cleaned around the pcb button area. It still didn't work. I replaced the rubber dome part of the button with conductive foam shielding from a satellite dish. Then it worked, although the feel of the button was different. I discovered that it is a 3 minute timer- perfect for timing ramen noodles. 😋
 |
| Scrabble timer (photo from eBay) |
The old AAA battery was very corroded, especially at the negative end (because it expired 18 years ago!). The negative terminal in the battery compartment was also extremely corroded. I took the timer home for further troubleshooting. Once I opened the timer, I could see that the negative wire inside was corroded off, and the PCB was damaged around the button.
 |
| timer battery and spring terminal (stretched during removal) |
 |
| Negative end of the timer battery |
My mom's digital kitchen scale had the same problem with the wire corroding off, and I was able to fix it by just replacing the wire. For the timer repair, I had to replace both the negative wire and terminal spring, using parts I salvaged from other things I took apart.
The corrosion on the timer continued onto the circuit board. First, I tested to see if the chip was still functional by connecting a AA battery to the solder joints on the circuit board. I heard a beep, which meant the chip was getting power, so I decided to continue the repair attempt. I cleaned the switch area with alcohol, but the damage was too severe. It's the worst corrosion I've ever seen.
 |
| Example of a corroded circuit board- photo by Brabus on eevblog.com |
The screen display worked, but the button did not. So next, I cleaned around the pcb button area. It still didn't work. I replaced the rubber dome part of the button with conductive foam shielding from a satellite dish. Then it worked, although the feel of the button was different. I discovered that it is a 3 minute timer- perfect for timing ramen noodles. 😋
 |
| Conductive foam |
 |
| Conductive foam |
Friday, August 3, 2018
Electronic Pinscreen (from the archives)


The finished Pinscreen on display at the Austin Maker Faire. I showed it in May 2017 and May 2018 in Austin, also Floresville and San Antonio.

Here's one more close up picture. It shows up well in the dark. I think it would look good in the dark room at the Austin Maker Faire, but then my other projects would be harder to see.
Friday, July 27, 2018
Recycled Soap #4


Thursday, July 26, 2018
Component-Level TV Repair (From the archives)
Back in 2016, My dad was watching TV, and he heard a loud pop and then the TV stopped working. No lights turned on whatsoever, which meant it might be a problem with the power supply. It was a 42 inch TV, and would probably cost over $300 to buy a new TV.
My dad decided that we could try to fix it because it was already broken and I couldn't make it any worse. When we opened it up, I saw a bulged capacitor and a soot stain around a chip on the power supply board. I told my dad which parts to buy on Amazon and Ebay, and I also needed a desoldering tool.
I practiced with the desoldering tool on some scrap circuit boards before I started on the repair. First, I removed the old chip and the old capacitor. The new capacitor was too tall to fit in the case, so I had to extend the leads and attach it sideways. The other solution would have been to drill a hole in the case, but that would have looked messy. I added a socket for the chip, which means that it will be easier to replace if it ever fails again.
The cost of the repair, including the capacitor, chip, set of IC sockets, and the desoldering tool was less than $25. The hardest part of the repair was removing the TV from the wall mount. The repair was successful, and has continued to work for over 2 years now.


This is the capacitor.
Amazon Affiliate link for the IC sockets I used: https://amzn.to/2LUCy4a
Amazon Affiliate link for the de-soldering tool: https://amzn.to/2uUWqxj
Power Supply Underglow

I purchased an LED light strip from the clearance department of Walmart. It's the type that is designed for cars, which runs on approximately 14 volts. I added it to the underside of the main deck of my power supply. I'm running it off the 9-Volt rail with a resistor to make it less obnoxiously bright and to save power.


Thursday, July 5, 2018
Dollar Store Timer Battery Upgrade


 |
| remove back cover |
 |
| strip wire |
 |
| tin wire |

 |
| attach wires |
 |
| done |
Why Bad GFCI Plugs Shouldn't be Donated
Griffin recently spotted a GFCI plug at a Habitat for Humanity ReStore. It was a good price, so he bought it. But you can't tell at this type of store whether electrical items are good or not. Griffin at least has the advantage that he knows to expect some of the items to be bad, and has a way to test them. He worries that the average person, just looking for items for their home, wouldn't know this and might buy one of these unreliable items and accidentally start a fire or electrocute someone.


This GFCI outlet, apparently was fried on the inside, which made it stuck ON. So it wouldn't cut the power in an emergency, which is what it was designed to do. It is supposed to cut the power if there's a situation like the classic "dropped a hairdryer in the bathtub".
Because it was already broken, Griffin took it apart to find out what was wrong on the inside. If you can see from one of these three pictures, there is soot on the circuitboard at the bottom center of the picture. The solenoid coil that actually does the switching has overheated and melted. This would not have been something Griffin could fix.
So Griffin says, If you are replacing failed GFCI outlets or broken switches, Please do not donate them to Habitat or other resale shops!
Friday, June 29, 2018
Vinyl- Filled Wood Carving


Power Supply- Major Upgrade
Yesterday, I went to a sale at the Georgetown Texas Habitat for Humanity ReStore. They mostly sell used building supplies, but they also have electrical stuff such as light switches. The sale was $5 for a 5-gallon bucket of stuff. I packed in drill bits, a screwdriver, wheels, paint, chain, switchplate covers, an electrical box, a light fixture, a green lightbulb, and much more.
One of the items I got was a 150 Watt landscape lighting transformer. This transformer had a NEMA20 plug, but it wasn't original or necessary. The cord had been painted. We don't have anything compatible with this type of plug, and I bought it to hardwire onto my power supply. My house has NEMA 15 plugs, which only work with NEMA 15 devices. NEMA 20 T-Slot outlets can work with either. They are more common in commercial buildings.

I think it is from 1998 because that's what the sticker on the back says. The modern equivalent of this transformer would be smaller, lighter, and less reliable because now they make switch mode transformers instead.

Just like the previous transformer, I removed the sensor/timer circuit because I want it to turn on instantly. I didn't have to do any soldering to install this transformer. Adding it made my power supply even heavier. The transformer takes up only 1/3 of the box. The box is so large that I had to mount it underneath the power supply box. It had a door to access the mode select switch. Since I took that part out, now I have extra storage space. I could store extra fuses in it.

One of the items I got was a 150 Watt landscape lighting transformer. This transformer had a NEMA20 plug, but it wasn't original or necessary. The cord had been painted. We don't have anything compatible with this type of plug, and I bought it to hardwire onto my power supply. My house has NEMA 15 plugs, which only work with NEMA 15 devices. NEMA 20 T-Slot outlets can work with either. They are more common in commercial buildings.
I think it is from 1998 because that's what the sticker on the back says. The modern equivalent of this transformer would be smaller, lighter, and less reliable because now they make switch mode transformers instead.

Just like the previous transformer, I removed the sensor/timer circuit because I want it to turn on instantly. I didn't have to do any soldering to install this transformer. Adding it made my power supply even heavier. The transformer takes up only 1/3 of the box. The box is so large that I had to mount it underneath the power supply box. It had a door to access the mode select switch. Since I took that part out, now I have extra storage space. I could store extra fuses in it.

Wednesday, June 27, 2018
Speaker Control Box
My "Lair" is the area under my bed platform. It's like a bunk bed but I never sleep under there because it's too short. I like to listen to music and watch Youtube videos there because cozy and dark. I have subwoofers mounted to the ceiling so the alarm clock will shake the bed above.

The box between the subwoofers allows me to disconnect either them or the tweeters. There's a piece of double sided perf board with two 68 ohm resistors, one for each input channel. This board eliminates the hum from the speakers when there's no audio being played.
 The switch is a double pole 20 amp mains light switch. It is like two standard light switches combined.
 For the wire between the amplifier and the box and the box and the tweeters, I'm using 18-4 sprinkler wire (meaning it has 4 18 gauge conductors) The subwoofers are wired directly into the box.
 The switches I am using have a Loop Hole. It is designed for making loops on the end of wire, but it sounds funny.

The box between the subwoofers allows me to disconnect either them or the tweeters. There's a piece of double sided perf board with two 68 ohm resistors, one for each input channel. This board eliminates the hum from the speakers when there's no audio being played.


Tuesday, June 26, 2018
How to Trick a Smart Battery Charger
The problem with multi chemistry smart battery chargers is that they will occasionally think that a nickel chemistry battery is unsafe to charge, assuming it is a lithium battery that is too low to charge safely. This is good if you actually have a lithium battery that is over discharged, but frustrating if you want to charge a nickel chemistry battery that is safe to charge.
To get the smart charger to charge the nickel battery anyway, I have to connect the battery to the 3.3 volt rail on my bench power supply for about 30 seconds. I used the 3.3 volt rail because it has a 1 amp current limit. I could charge the battery the whole amount with the 3.3 volts from my bench power supply, but it would be inefficient, could over charge the battery, and would overheat the regulator. I used the bench supply to charge the battery just enough so that the smart charger can recognize it. Warning- Do NOT do this with lithium batteries, which are more prone to catastrophic failure.
We had a similar problem with a smart lead-acid battery charger. Grandma's power wheelchair was parked in our house for over a year. The two lead acid batteries had self-discharged too low. The smart battery charger refused to charge them. New batteries would have cost at least $100. To trick the smart charger into working, we used a simple old car battery charger to raise the batteries' charge just enough for it to recognize. After that, they charge with the smart charger every time, with no issues.
Monday, June 25, 2018
Project from the archives: Nap Mat with Book Pocket
Mom writes:
When Griffin was in kindergarten, they still had nap time for the first half of the year. For a kid with ADHD, this was problematic to say the least. His brain was too busy thinking to fall asleep. He would talk or make noise by crashing into the legs of the desks. We tried to help by sending books to keep him quiet. Pop-up books were especially good for this.
I added a pocket to his nap mat (they used towels that year) so that he would always have a book with him and it wouldn't get lost. We made the pocket out of an old t-shirt, probably one that was a hand-me-down from his Uncle Michael. I think Griffin helped with the sewing. He has always liked machines, and the sewing machine was no exception. This idea could also be used to add zippered pockets or a pillow to the end of a towel, for example at the beach.

Battery Storage Box

I took 3 lbs of dead batteries to be recycled. We took them to an Austin public library since IKEA won't take batteries anymore. Batteries Plus Bulbs will only take 1 lb for free, and the dump requires batteries for recycling to be individually wrapped with tape. Recycling them keeps them out of the landfill and the chemicals can be used to make new batteries. However the recycled batteries I have seen for sale cost more than the regular ones and they were already leaking in the package.
For my 10 pounds of usable AA batteries, I needed a storage box. I had the idea of making a dispenser. At first I considered 3D printing a dispenser base and making the top part out of cardboard. All the 3D models I found used a track for the entire length which wouldn't work well because I have too many batteries and they are too heavy. It would have taken a lot of plastic to print, with lots of supports, and it might jam with too many batteries. So I asked my mom to design a box made completely out of cardboard. I found a corrugated cardboard box from my new box fan, and a thin cardboard box from Triscuits. The Triscuit box was almost already the right size, but wouldn't have been sturdy or tall enough on its own. Mom added corrugated cardboard inside to make it sturdier and a closer fit. Then she made another section of box with the corrugated cardboard, with a ramp at the bottom. We used packing tape to connect it. Then I drew a circle to show where to cut a hole at the bottom to dispense a battery. It turned out that I needed a slightly larger hole as well as a hole on the opposite side. Then the battery can be dispensed by pushing it out with your finger from one side.


Next, I zip tied a piece of MDF to the wire shelf next to my computer desk. Then I taped the box to it. Now I can dispense batteries for the Rift controllers while wearing the headset, without even looking.

Saturday, June 23, 2018
Rustic Clothes Rack
I used to organize my clothes for the week by placing piles on the stair railing. But Mom complained that it looked messy, and suggested I use hooks instead. Apparently I had first thought of this idea seven years ago. After I was done with this project, Mom found an entry in my Idea Journal from 2011. It was an idea for "Hooks for outfits for each day of the week. Attaches to bunkbed". This clothes rack attaches to the wall, not a bunkbed, but the idea is the same.
I built a rack with 4 dowels. It works great with clothes on hangers, but it could be used without hangers. It looks rustic because I used a weathered fence board for the back and ligustrum branches for the pegs. This was a good recycling project because Dad wanted to throw away the old fence boards. The ligustrum dowels were cut from my backyard and are "sustainably sourced" because the tree will grow back quickly even though we never water it and it is growing wild.
I put the clothes rack outside my bedroom door, because there was unused wall space in the hallway between my room and the bathroom. To install the clothes rack, I used a studfinder to mark where to put the nails. I pre-drilled with my cordless drill, and then I hammered in the nails.


Subscribe to:
Posts (Atom)