Wednesday, July 8, 2020

Network cabinet

I built this cabinet to hide the wires near the network, phone, and TV jacks. I used IKEA "wood" cut into strips on a table saw. The cabinet door is also from IKEA, and matches the other furniture in the room. I made sure to have plenty of ventilation by leaving gaps at the top and bottom of the door as well as at the back. I measured the temperature inside, and it was just slightly above ambient.
This cabinet blocks the annoying light from the network equipment in case someone wants to sleep near it. It will also keep dust out.
Before organizing the wires

Building the cabinet was the easy part. The hard part was doing the cable management. There are 3 boxes, 3 AC adapters, a power strip, a phone splitter, 3 phone cords, 5 ethernet cables, and a coax cable. It took lots of Velcro straps to keep the cables tidy. It would be nice to have shorter ethernet cables that don't need to be looped.
After organizing the wires (and adding an additional box and AC adapter)

Tuesday, July 7, 2020

Teabot Cord Replacement

When I first built my tea robot, it had an 18 inch long 14/3 SJT cord. I decided to replace it with a 5 1/2 ft 16/3 HSJO cord because the short cord annoyed me.
The old short cord
There are lots of types and sizes of cords that I have learned about. Here's a website I found that has a good guide to cord types:
 https://www.interpower.com/ic/designers/designing-for-export/guides-and-charts/ULCSA-Classification-of-cords.html

The new longer cord

Several of the parts I have added to my tea robot recently have been recycled from a device I took apart. The large water tank, one of the water level sensors, tubing, and cord are all from a neighbor's broken Keurig that I wasn't able to repair. The problem with it wasn't electric or electronic- the pod chamber just wouldn't stay closed. Even if I had been able to fix it, it was annoying because it wasn't compatible with reusable pods.
One water level sensor turns the pump on when there's not enough water in the upper tank. I made a second water level sensor for the lower water tank out of metal skewers (since the probes needed to be food safe), separated by a piece of plastic to prevent short circuits. When the tea robot senses that the lower water tank is empty, it disables the pump and a pink LED lights up to let me know to refill it.

Pink LEDs are rare in most products, but they are becoming common in grow lights.

Sunday, May 24, 2020

Torque Wrench

When we cleaned up my grandparents' duplex, we found some old tools. My grandpa had moved them twice before that, but then couldn't take them with him to assisted living. At that point, he wanted us to store the tools for him in case he moved back to a house again later.

What I noticed first about the torque wrench was that it was still in the box. Some of his tools were in toolboxes, and well used. Others were rusty or mixed up in the bottom of a plastic bin. There was even a screwdriver that appeared to be melted by a solvent. The torque wrench, on the other hand, was in pristine condition.

At the time, I didn't need a torque wrench. I kept it because I knew it might be useful. Last weekend, I finally got a chance to use it. I replaced the differential fluid in our pickup truck. The fluid hadn't been changed more than once in 100,000 miles. I used my impact wrench with a new 3/8 drive 1/2 inch impact socket to remove the differential cover. Then I drained the old fluid into a drain pan. It didn't look too bad, but was definitely time to change it. I used a premade gasket to seal it. I used the torque wrench with a 1/2in drive 1/2in socket to tighten the bolts in a star pattern to 30 ft-lbs of torque. Then I refilled with the recommended fluid and put the fill plug back in.

Making a Knife from Scratch- Second Attempt


This is my second attempt at making a knife. This time, I used part of a dishwasher door bracket for the metal blade. I beveled the correct side for right-hand away cutting use. I also made the bevel angle more acute. It’s still the same basic square shape as the last one, but like a mirror image. Just like the previous version, I used scrap cedar that I picked up at either Lowe's or Home Depot. I used my angle grinder to cut the blank and to rough grind the bevel. Then I used my strip sander to sharpen the blade and round over the handle. It’s not the sharpest knife because I am still honing my honing skills. It’s good enough for opening boxes and carving balsa.


Monday, May 18, 2020

More Teabot Upgrades

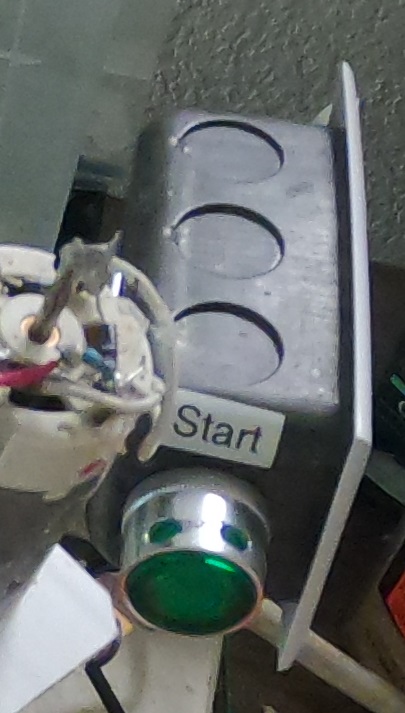
I have made a lot of changes since my last post about 6 months ago. I replaced the servo motor with a waterproof one. I added a start button with a "breathing" light effect programmed through the Arduino. Then I upgraded the heat sink to make room for the button's MOSFET. I descaled the coffee maker part, and it made such a difference that I had to reduce the heater time so the cup wouldn't overflow, without reducing the cycle time. I replaced the switch cover with a waterproof one that has a sideways lever.
New blue servo motor
Green flashing start button


New main power switch


After all those changes, I used it for awhile. And then changed it even more! I salvaged parts from a neighbor's broken Keurig. I added the 90 ounce water tank which means I don't have to refill very often. From the Keurig parts, I also used a pump, output check valve, and the water level sensing pins from the heater tank. I have a MOSFET to turn the pump on when the sensing pins are above water. I attached an MDF base so it's easier to move the whole thing. And last, I added labels to make it easier for my mom to understand the purpose of all the switches.

pump, valve, and tank

Programming port


Wednesday, April 8, 2020

Making a Knife from Scratch- First Attempt

I made this boxy carving knife out of a piece of metal that might have been part of our old doorbell. I used my angle grinder with a standard grinding disk to get the rough profile, then a flat sander on my drill press to get it closer to final. Then I used my "strip strop" (my band saw converted to a strip sander, with a worn cloth sanding belt) to finalize the edge. It is not the sharpest knife, but it's the first one I've made from scratch. The handle is made from scrap cedar that I picked up at Home Depot or Lowe's. I used my strip sander to round over the corners of the handle. Considering that my budget was zero, I think it turned out pretty good. The main mistake was that I ground the edge on the wrong side. I picked that side because it was more ergonomic to grind, but it turned out to be a left handed knife. This knife can be used for opening boxes or carving if you are left-handed. It is sharp but not pointy.

Tuesday, March 31, 2020

Quadraphonic UTAU Cover


One of my hobbies is mixing music with computer generated voices. So far, I have started with UST files that other people have created. These files describe the length, pitch, and pronunciation of each note. I created this mix of Daisy Bell (Bicycle Built for Two) using UTAU software. Vocaloid is another type of software that is used for this, but it costs $500 for the base software plus $100 for each voice bank. So creating this song mix with Vocaloid would cost $900. Instead, I am using UTAU which is free with mostly free voice banks.

For this quadraphonic mix, I used four characters with different voices- Waltt, Ken Shippai, Alice 16,  and Daronavo Odalakian. I put one on each channel. Audacity only supports 2 channels, so I downloaded a new audio editor, OcenAudio, that supports plenty of channels. I set up the mix so that it sounds like a different character is singing from each corner of the room. This fully takes advantage of my speaker system.

Quadraphonic systems have largely been replaced by more advanced surround sound, so there isn't much quadraphonic music available to download. There's not even much surround sound music available, and it isn't supported by Youtube. If I upload my music to Youtube, it will be converted down to stereo (2-channel). If I put it on Google Drive instead, the integrity of the file is preserved. To get the full experience you must have a surround sound system (quadraphonic, 5.1, 7.1 etc.) You can download it or play it in newer browsers such as Chrome and Edge. Please ask before reposting.
Here's the link to my wav file:
https://drive.google.com/open?id=1Ia0jza4F4fMdphNz7FHNxe5EL9CWK5AW


Sources:
I got the UST file from Amzsie here: https://www.youtube.com/watch?v=CXWbO5SjgGE

Sunday, March 29, 2020

Strip Sander Light

Several years ago, I got a glass-cutting bandsaw from my grandpa. He hadn't used it in several years, and unfortunately the blade broke the very first time we tried it. I tried to convert it to a regular bandsaw, but then I found out that the belt had rotted. It burned through a new belt, so I superglued it back together a few times. Then I tried some alternatives such as a vacuum cleaner gasket. Somewhere along the way, the regular saw blade broke. The glass cutting blade was at least $80 to replace, and the regular one was about $20. So it sat on the shelf for a while because I didn't want to keep spending more money on it. Finally, I decided to use a roll of cloth-backed sandpaper to convert it into a belt sander. I superglued the ends of the fabric together. It has held up quite well, completely wearing the sand off the cloth before the sanding strip breaks.

The next modification was mounting it to the workbench so it wouldn't shift around. I put it next to my drill press, and I was using the light from the drill press above. But this was awkward. So next, I decided to add a separate light to it. I used an led desk lamp from IKEA. They seem to only have a smaller USB version now. Here's an affiliate link to a similar one on Amazon:  https://amzn.to/2UoUmLg
To mount the light I drilled 2 quarter inch holes the right distance apart and made a quarter inch thick wooden spacer with the same hole pattern because the base from the original light was thicker than the sheet metal of the sander's box. Then I screwed the light in with some small machine screws. My dad suggested changing the switch. So then I found a toggle switch with an led. I drilled a half inch hole to mount the switch.
I installed an outlet inside the box of the strip sander so it wouldn't need an extra plug.

Wednesday, March 18, 2020

Quadraphonic Surround Speakers

I watched a video on quadraphonic sound. It's like the surround sound of the 1970s. Most surround sound systems these days are 5.1 or better.
I have collected a few too many speakers, so I decided to put another set to use. I already had two 4 ohm speakers on the sides of my computer monitor, and I decided to add two more on the other side of the room.
I purchased a 2x20W amplifier and installed it on the front speakers. The rear speakers are now using the old amplifier that used to be on the front speakers. The front speakers are used more so they needed a more efficient amplifier. the 2x20W class D doesn't need a heat sink. the 2x15 class A/B needs a heat sink and fan.
I used a 22 gauge 4 conductor wire running under the rug to the splitter box. I used an 18 gauge 2 conductor wire from the splitter box to the rear speakers. For the splitter "box" I used a section of wood from a peach tree with a 2 1/8 inch hole drilled in it.

I tested this setup with Minecraft. It was interesting to have the sounds of different Minecraft animals coming from different directions.  Hearing the ender dragon behind me was the most impressive.

Sunday, February 23, 2020

6 pin PCIE to XT60 Adapter

Since I am going to college soon, but I'm not planning to bring my solar battery box, I will need a different way to power my computer speakers. They use about 24 Watts at max volume. My dad suggested using an AC adapter, but I don't have one of that level. Buying one would be too expensive. I was inspired to use my computer power supply because I have seen that arcade games do the same thing. Arcade games usually have Molex connectors- lots of them. I do not have any Molex connectors on my power supply but I do have a spare 6 pin PCIE connector. So I made an adapter to power my speakers from my computer power supply. That is a 6 pin PCIE to XT60 adapter.