Our pellet grill kept getting clogged with wet pellets. We had a plastic fabric-type cover to drape over it, but sometimes forgot to put it on. Then the plastic got old and brittle and the chimney made a hole in it. We bought a new one, but it doesn't fit well. Cleaning out the damp pellets was messy and wasteful.
We thought it would be nice to have an umbrella or gazebo to keep the grill dry and make it possible to use the grill when it is raining. But gazebos are expensive and aren't the perfect size. They are often flimsily made with thin short material to be able to be flat packed. Fabric umbrellas are awkward, flammable, and not squirrel proof. I wanted something more "skookum".
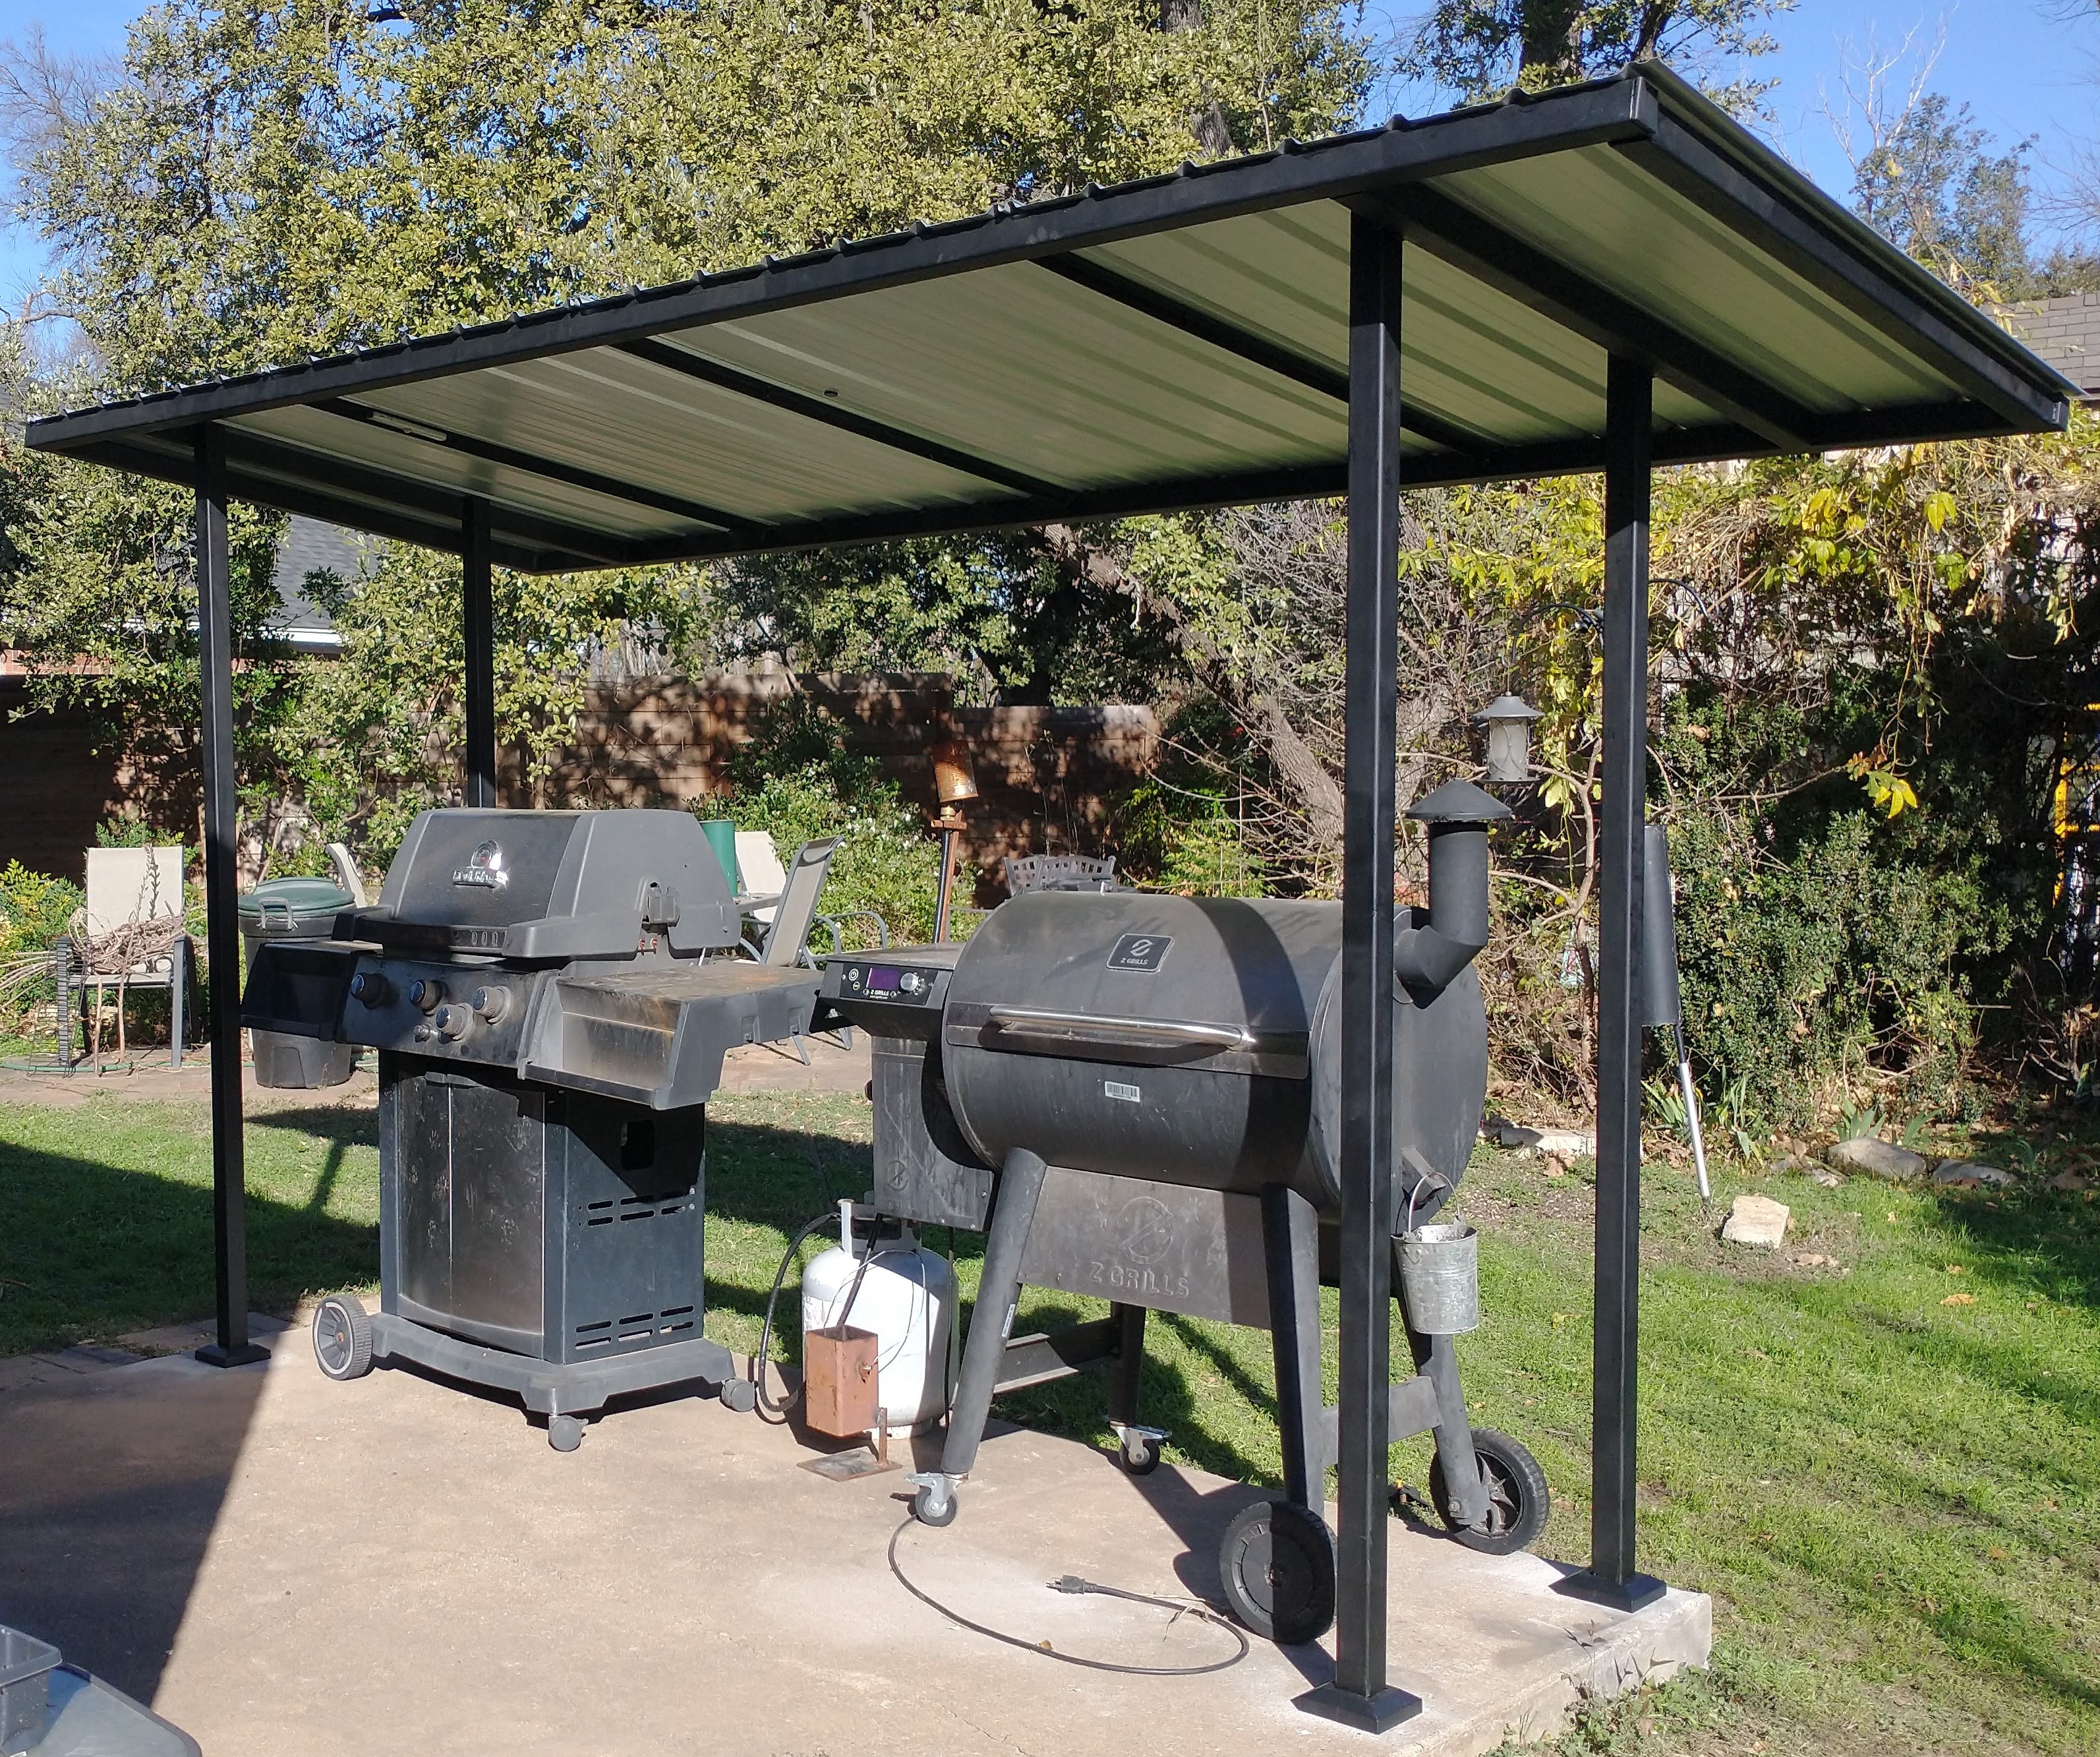
After a lot of thinking, shopping, and planning, we decided that a custom welded patio cover with a metal roof would be perfect because I know to weld.
The patio is 10 feet wide, so we purchased 12 foot pieces of 2 inch square tubing from a metal supply place. The 12 foot pieces barely fit in a rental truck. We bought corrugated metal roof panels from a different metal supplier. We also got plates for the feet, anchor bolts, a couple pieces of angle iron, and screws for the roof.

The square tube components of the roof frame were welded together in the garage, as well as the feet to the legs. Then I welded the legs to to the frame onsite. The exact placement of the legs on the frame changed slightly from the plans based on what position looked the best. After that, I welded extra angle iron to the frame. We used scaffolding and 4x4 blocks to support the structure while I welded it together. The structure was stable, but could be tipped over if we pulled on the back overhang.


No comments:
Post a Comment