Sunday, July 10, 2022

Cheap Sewing Machine Needles

 We bought some sewing machine needles online that were really really cheap. But it was a deal that was too good to be true. Apparently their quality control is abysmal. My mom tried sewing with the needles, and had a lot of problems with thread breaking or tangling. It probably wasn't her sewing machine, because changing the needle helped. But the proof was when she found needles with no holes!

Photo taken with digital microscope.


Thursday, July 7, 2022

This Pincushion is a Piece of Cake


We bought a grill and installed a new ceiling fan, and had blocks of styrofoam left from the boxes. I wanted to recycle the foam, but I had trouble finding somewhere to recycle it. I did find one business recycling company, but they would have charged $20 to recycle the small amount I had. So I decided to think of ways to reuse it instead. I remembered the last time I made a pincushion as a present for my mom, I used foam as the core.

This time, I didn't want to make a plain cube shape. A lot of pin cushions are spherical. A sphere might be the safest shape to stick pins in so you don't stab yourself, but I don't have an easy way to make a sphere. I looked at the foam I have, and thought about making a funny shape like a slice of bread or a wedge of cheese. I finally decided on a slice of cake.

It's pretty safe to cut foam with a hot wire tool or a knife. I used a miter saw because it's mounted to my workbench. There's a lot of dust to clean up after that.


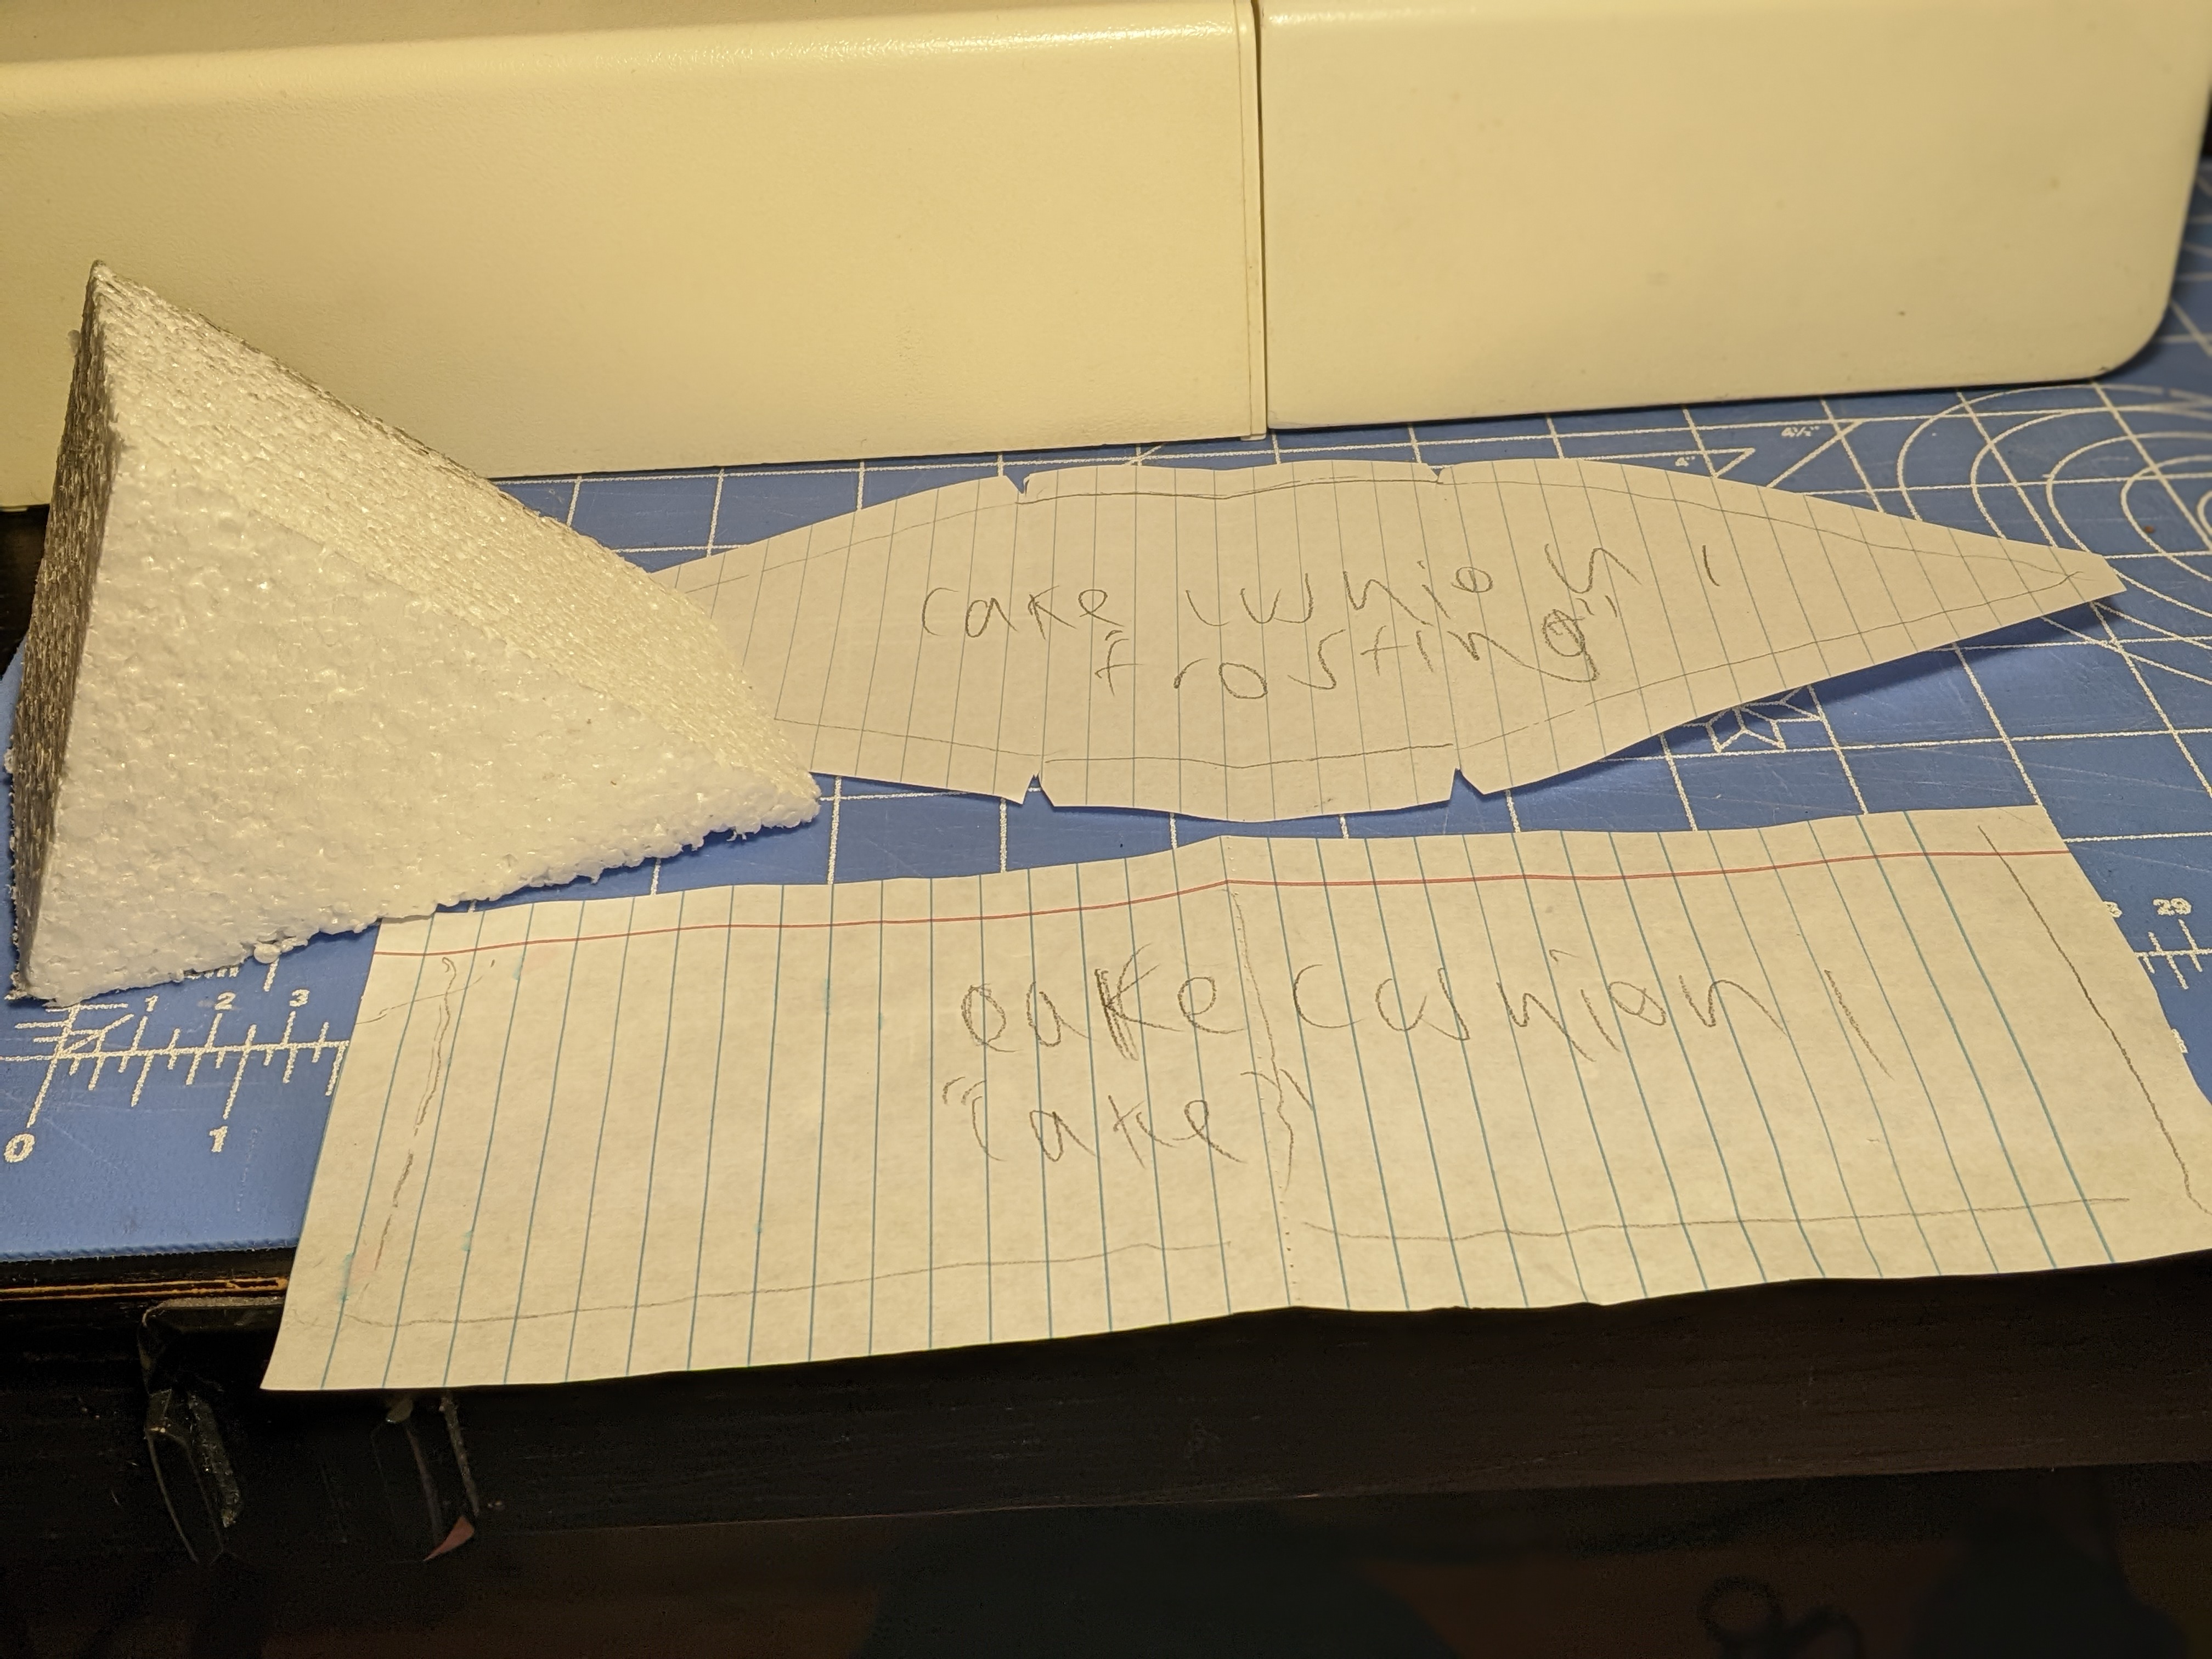
After I cut the foam to shape, I created paper patterns. I drew around each side of the foam block, making two groups of shapes. The "cake" section is basically two rectangles merged together. Then the "frosting" part is two triangles linked by a rectangle. I added a seam allowance to the pattern for each section, and then cut fabric for each one. I also added a rectangle of interfacing to the cake section to make it fold perfectly. 

I chose a multicolor polka dot fabric for the cake, because it reminded me of cake sprinkles. Apparently, the polka dot fabric and interfacing were from my great grandmother's fabric stash. The frosting fabric is a fuzzy striped knit. It would have been more interesting to have colored "frosting" but I couldn't find the right one.

After the fabric pieces were pinned together, I sewed two sides on the sewing machine. Then I tested to see if it fit on the foam. I sewed around the folded-under edge of the cake fabric rectangle, put the foam back in, and then Mom hand-stitched it to the frosting fabric.  

Wednesday, July 6, 2022

Braided Rug from Recycled T-Shirts

This is one of my largest t-shirt recycling projects. We started it several years ago, but took a break because I wasn't very good at sewing by hand. First, we cut all the shirts into strips. There's a few ways to do this. There's the t-shirt yarn method we learned at Maker Faire- cut the shirt into a long continuous strip by cutting in at the hem and then going around and around. Or we could lay the shirt flat and cut across with a rotary cutter on a cutting mat, making loops. These could be looped together, or cut at the end and then sewn together to make long strips, which is what we did. We decided it was easier to only sew on one or two strips at a time so it wouldn't get tangled when braiding. The strips tend to curl, which is good if you want to hide the patterns or pictures on the front of the shirts. There's some Mickey Mouse and other cartoons hidden in this rug.


Mom did most of the braiding, and I spliced the strips together. Then we used a heavy sewing thread to hand stitch the braid into a large spiral.  


Tuesday, June 28, 2022

Wood Sculpture- from the archives


Griffin made this mixed media wood sculpture more than 10 years ago. He started with a 3x3 piece of wood, and then drilled, sawed, and painted it. Next, he added hot glue, duct tape, nails, screws, roof shingle, ribbon, yarn, and plastic pieces. 
This was probably from before his Frankenlog series of sculptures that had personalities, moving parts, or useful features.

Thursday, June 9, 2022

Solar Power Part 5- Charge Controller and Marine Battery

 I have been working on my solar power bank system for over three years. I have a solar panel in front of my window, connected to some 12-volt batteries. I mostly used old sealed lead-acid batteries with a couple of new ones. Unfortunately, I didn't add a charge controller. I thought the system would be fine without it. However, when I was away for a few months, the solar panel continued to charge the batteries every single day but there was no load drawing power. Unfortunately, it is bad for this type of battery to keep overcharging it (although not nearly as bad as overcharging lithium batteries). Other times, the batteries got over-discharged, which is also bad.

After four years, some of the old batteries were barely putting out any current. I decided to get a new battery, and add a charge controller this time. The new battery is a marine battery I got from a neighbor. It's not brand new, but it definitely works well. It is designed to start a boat engine, not for off-grid energy storage.

I made a battery terminal from copper tubing so that it could be crimped onto the end of a wire. I cut a short length with a hacksaw and then split part of it open with a utility knife. Wow, copper is soft! After I attached the wires, I covered up the positive terminal to ensure nothing could accidentally short out the battery.  


The charge controller will ensure the battery doesn't get overcharged or over-discharged in the future, even when I'm gone for a few months. I should have added a charge controller a long time ago. They are cheaper than I thought.


affiliate link to charge controller https://amzn.to/3MAjxT8

Saturday, June 4, 2022

Wooden Hangers


We have lots of cheap plastic and metal hangers. They often end up breaking, but we saved some parts to recycle. The first wooden hanger I made was for pants, and was a way to reuse the metal bar and clips from a broken hanger. I used more of the oak flooring scraps for the wooden parts.

The next hanger I made was a prototype of a shirt hanger. Because the wood flooring is so sturdy, it doesn't need a cross bar. I could probably make a hanger that will hold a shirt and pants, but it would be more work and more sanding.

The next two hangers still need hooks. I tried to build them like an assembly line, but I got impatient waiting for the glue to dry. My mom's advice was to add a dowel to increase the strength of the joint, but the pieces shifted while I was drilling the hole. On the next one, I added staples to hold the joint steady while the glue dried. I clamped one hanger in the garage vise, and the other one in the workbench vise in the shed while they dried.

After the glue had dried, I used a router bit in my drill press to round over the edges. Then I used my belt sander to smooth everything. This is important so that the hangers don't snag the clothes.


Tuesday, May 31, 2022

USB-Powered LED Lamp

While walking in my neighborhood, I found a section of 1 inch diameter wire. It had a thick layer of plastic insulation and then a 3/8 inch bundle of aluminum wires inside. I don't really have a reason to use this large size of wire, so what could I do with it besides just recycling it?

I was inspired to make a desk lamp that would take advantage of the structure of the wire. I used an old gearbox as the base. I used a piece of oak with three LEDs for the top. I added a single-pole double-throw center-off switch. It selects which current limiting resistor is used in the circuit. It uses a 100 ohm resistor for the high brightness, a 2500 ohm resistor for the low brightness, and a capacitor to smooth the transition between brightness levels. I haven't moved the capacitor inside the base yet. The thin positive wire is outside the insulation of the large wire.


 Last night, I wanted to take a photo of the lamp in action. In order to take a photo, I set up a tripod outside (where it was completely dark) and turned off the flash on the Nikon camera. It chose the correct settings automatically- exposure time 4s. The daytime photo had exposure time 1/500s. Both had ISO speed 100 and f stop 4.5 in aperture priority mode.

Saturday, May 28, 2022

Laundry Basket Upgrade #2


After the successful upgrade of my rolling laundry basket to replace the plastic axles and wheels with better ones, I decided to upgrade my second laundry basket too. That way I can have one for clean laundry and one for dirty laundry. First I tried using a round plant stand. It was made of wood with 4 swivel wheels. I didn't need many tools to attach it and it did slide smoothly, but it was hard to steer.
I decided to upgrade again. This time, I used large plastic wheels from an old grill. They are designed to roll a heavy grill, so they work well for a laundry basket. With two wheels, the basket needs to be tilted to roll. So I needed to add a handle. This basket didn't have a handle like the other one did, but I based the design on the other basket's handle. I used two strips of oak flooring and a piece of PVC pipe. 


Monday, May 23, 2022

Drill Press- Replaced Feed Handles with Golf Balls

When I used my drill press for a recent project, I found that the feed handles made my hands hurt. I decided to replace them with bigger knobs. I happened to have extra golf balls. These are old golf balls that I had lost in the backyard but found again recently when we were cleaning up after a tornado. 

Drilling through golf balls was messy and created colorful swarf. Golf balls are slippery and round so it was important to clamp them well. First I drilled a small hole 1/4 inch from the bottom then a larger hole 1/2 inch from the bottom. 

Cross section of hole in golf ball (not to scale)

All I had to do was unscrew the old handles and screw on the golf balls. If I get tired of the golf ball handles, it will only take a moment to put the stock handles back on.

Comparing old handle with a golf ball


Friday, May 13, 2022

Drillbit Sharpening #2- Drill Doctor 750X

Three years ago, I tried sharpening drill bits with a cheap sharpener. I got frustrated because it was hard to use and I didn't get very good results most of the time. The old sharpener would make the bits worse instead of better.

This summer, I finally bought the expensive Drill Doctor 750X. It is much easier to use, and actually works! It's faster and more precise. So far I've been getting great results with it.

Before


After sharpening
I bought a Drill Doctor at Northern Tools with a coupon. It's also available through Amazon, so here's my affiliate link: https://amzn.to/3FKJugS