Tuesday, July 25, 2023

Ikea Strainer Repair


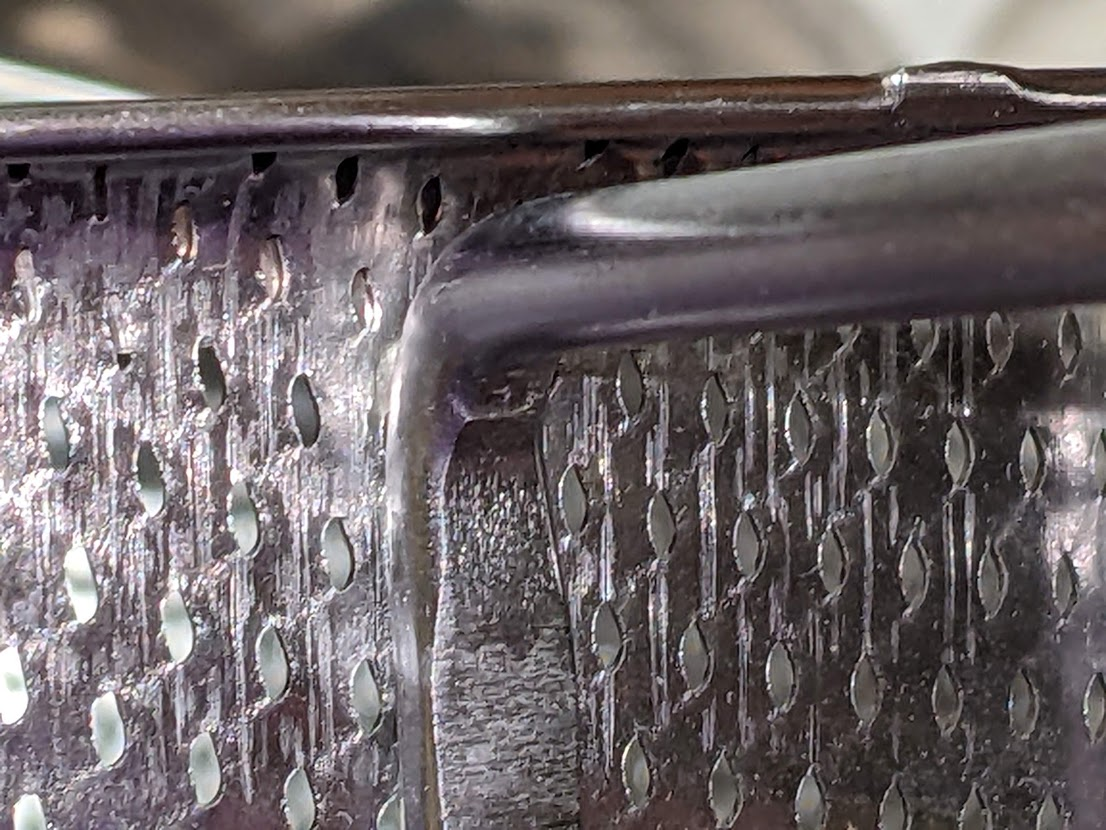
We've bought three copies of a strainer from IKEA. Overall , we like the design because the handle stays cool and it fits over one side of the sink perfectly. However, two have broken because the handle isn't strong enough. The handle is spot welded to the mesh side of the strainer instead of to the rim, so after some normal use the mesh rips. And then we go buy a new one.....

New strainer- handle attached to mesh but not rim.


Torn mesh, handle pulled off.


After repair- handle welded to rim

Now that I'm able to weld, I decided to repair the first two broken strainers. For the first one I repaired, I replaced the handle (which has fallen off and gotten lost) with a piece of rebar. For the second one I repaired, I welded the handle to the rim. The strainer is made of stainless steel and I'm using mild steel wire (ER70S-6 .030dia), so this is not the best idea because the weld could rust or crack. However, it seems to be strong enough and it was cheap and quick to repair it. 

Barbenheimer Limeade Pair


I'm having fun this summer making interesting flavors of drinks and sodas. I have plenty of supplies to create with- flavor extracts, plastic squeeze bottles and upcycled glass bottles with pour spouts for syrups, soda stream machine, and frozen fruit. I also bought a whole bag of limes because they were a good price at a Mexican grocery store. 

For some of the drink flavors, I added frozen dragon fruit mostly for the very bright pink color. That reminded me of the current "Barbenheimer" trend, so I decided to make a pair of limeade soda flavors to match.

Pink Limeade

1/4 cup frozen dragon fruit (can substitute strawberries, cherries, raspberries, or watermelon)

1/8 lime

simple syrup

seltzer or unflavored soda

Atomic Mango Limeade

1/4 cup frozen mango

1/8 lime

 pinch hot pepper salt (or cayenne or other dried hot pepper)

simple syrup

seltzer or unflavored soda 


Muddle or blend the frozen fruit (along with any powdered flavors). Add the lime wedge and muddle. Add simple syrup and then soda.

Here is the affiliate links for the muddler and pour spouts that I used:

Muddler https://amzn.to/3Kf4n78

Pour spout https://amzn.to/44EdJl3

And a link to my Youtube video of making both drinks:

https://youtube.com/shorts/6GLEudqyUt8
Saturday, July 22, 2023

New Shielding Gas Tank

The first welder my dad bought for me at a garage sale included a small cylinder already filled with 75% Argon 25% carbon dioxide. This shielding gas is needed to make smooth welds because it prevents porosity from oxygen, hydrogen and nitrogen. 

When I tried the welder, my welds just didn't look good. I wasn't sure if the problem was my technique or the equipment.

Eventually, I bought a new welder, but I still had problems. Next, I bought a new regulator. It makes the gas flow at a consistent adjustable rate. That seemed to fix the problem. 

I tried it with the old welder, and it worked ok with it too. But then I ran out of shielding gas and needed to buy more.

Exchanging the cylinder would normally cost around $30 (for comparison, the old welder was $75 including the cylinder). However, there was also an additional $30 charge to recertify the cylinder, which must be done every 5 or 10 years. The old cylinder was about 30 years overdue!, the new one is good for 10 years

After I hooked up the regulator to the tank there was a leak, so I returned that regulator, and got a new one which worked perfectly.

I have it chained to the wall so that it does not fall over and turn into a rocket.


Spoon Extender


I recently bought a jar of honey grapefruit and orange tea at a new Costco location near me. It can be added to hot or cold drinks (including soda) or even used as jam. It tastes great so I have already used about half the jar of this "fruit goop". This created a new problem - my spoons are not long enough to reach the bottom of the jar.


My creative solution is to make a Spoon Extender. I welded together some square steel tubing and then tapped a hole for a bolt. Then I added a wing nut. It's like a small specialized clamp, and it should work with any type of spoon. I plan to add a rubber or felt grip on the end to protect the spoon from getting scratched. I welded the end of the handle shut to make the handle more comfortable to hold.


Friday, July 14, 2023

Improved Welding Wire Spool Holder

My dad complained about how much space my previous spool holder took up, so I decided to build something that would have a smaller footprint. The base is made from 3/4 inch angle iron, and the upper frame is made out of rebar. I used a stainless bolt and welded on a matching nut to hold the spool. This worked out fine even though welding dissimilar metals is not the best idea. I drilled a small hole in the top of the welder for the wire to pass through. Once the wire was inside the welder it needed to turn a corner, so I used an empty spool as a guide/pulley.


Learning Welding

My dad picked up a MIG welder complete with shielding gas tank a year or two ago. The first thing I needed was safety equipment (gloves and helmet). Once I started welding, I noticed that my welds looked bad, so I got a spool of flux core wire. To use this wire I needed to swap the polarity, but this welder cannot be swapped. I got a new welder, but my welds still looked bad. It turned out that the regulator was not allowing enough shielding gas flow. I got a new regulator, and my welds instantly improved. 

My first functional project is a watermelon cage to protect the watermelon in the garden from raccoons. I started with 2 10ft pieces of 3/8 rebar, and then cut it into smaller pieces. After I welded a frame, we attached chicken wire to the outside. 


Thursday, July 6, 2023

Welding Wire Spool Adapter


I was running low on solid mig wire. I found that an 11 pound spool would be the cheapest per pound. But it turns out that it won't fit in my welder. I suppose I should have read the whole instruction manual, but the spool didn't seem that large, and I didn't open the box at the store.

I had to decide whether to return the wire and buy several smaller rolls for a higher price, or find a way to force it to work. I tried to brainstorm some solutions- wind the wire onto smaller spools, make an adapter, mount the spool on the door, or shave off part of the rim of the spool. Eventually, I found a way to make a lazy susan to hold the spool on the open door of the welder. 

I used roller ball feet to make the lazy susan spin smoothly. Here's an Amazon Affiliate link to the bearings I used: https://amzn.to/3pyEBE1 First, I tried a cardboard circle underneath to support the spool. This showed me that the concept was good, but I needed a stronger base. Next, I used the bottom of a powdered drink mix can. For the center axle, I used a steel drink can. I cut it to make a smaller diameter to fit. Ironically, I couldn't use the new welding wire to weld the lazy susan together.

After I finished this project, I posted a photo to Reddit to get advice to help me learn to weld better. One person said "you can't weld something that isn't clean, all the paint and [stuff] on the outside of the can will [mess] up your weld." They also suggested using better materials to start with, so my next project will be finding more materials to experiment with.